
In this guide, you’ll learn how to enable Meetical AI for your Confluence instance as a Confluence Admin.
Before you start
You need to be a Confluence Admin to access the Meetical Admin settings and enable Meetical AI.
Step 1 - Open Meetical Admin Settings
-
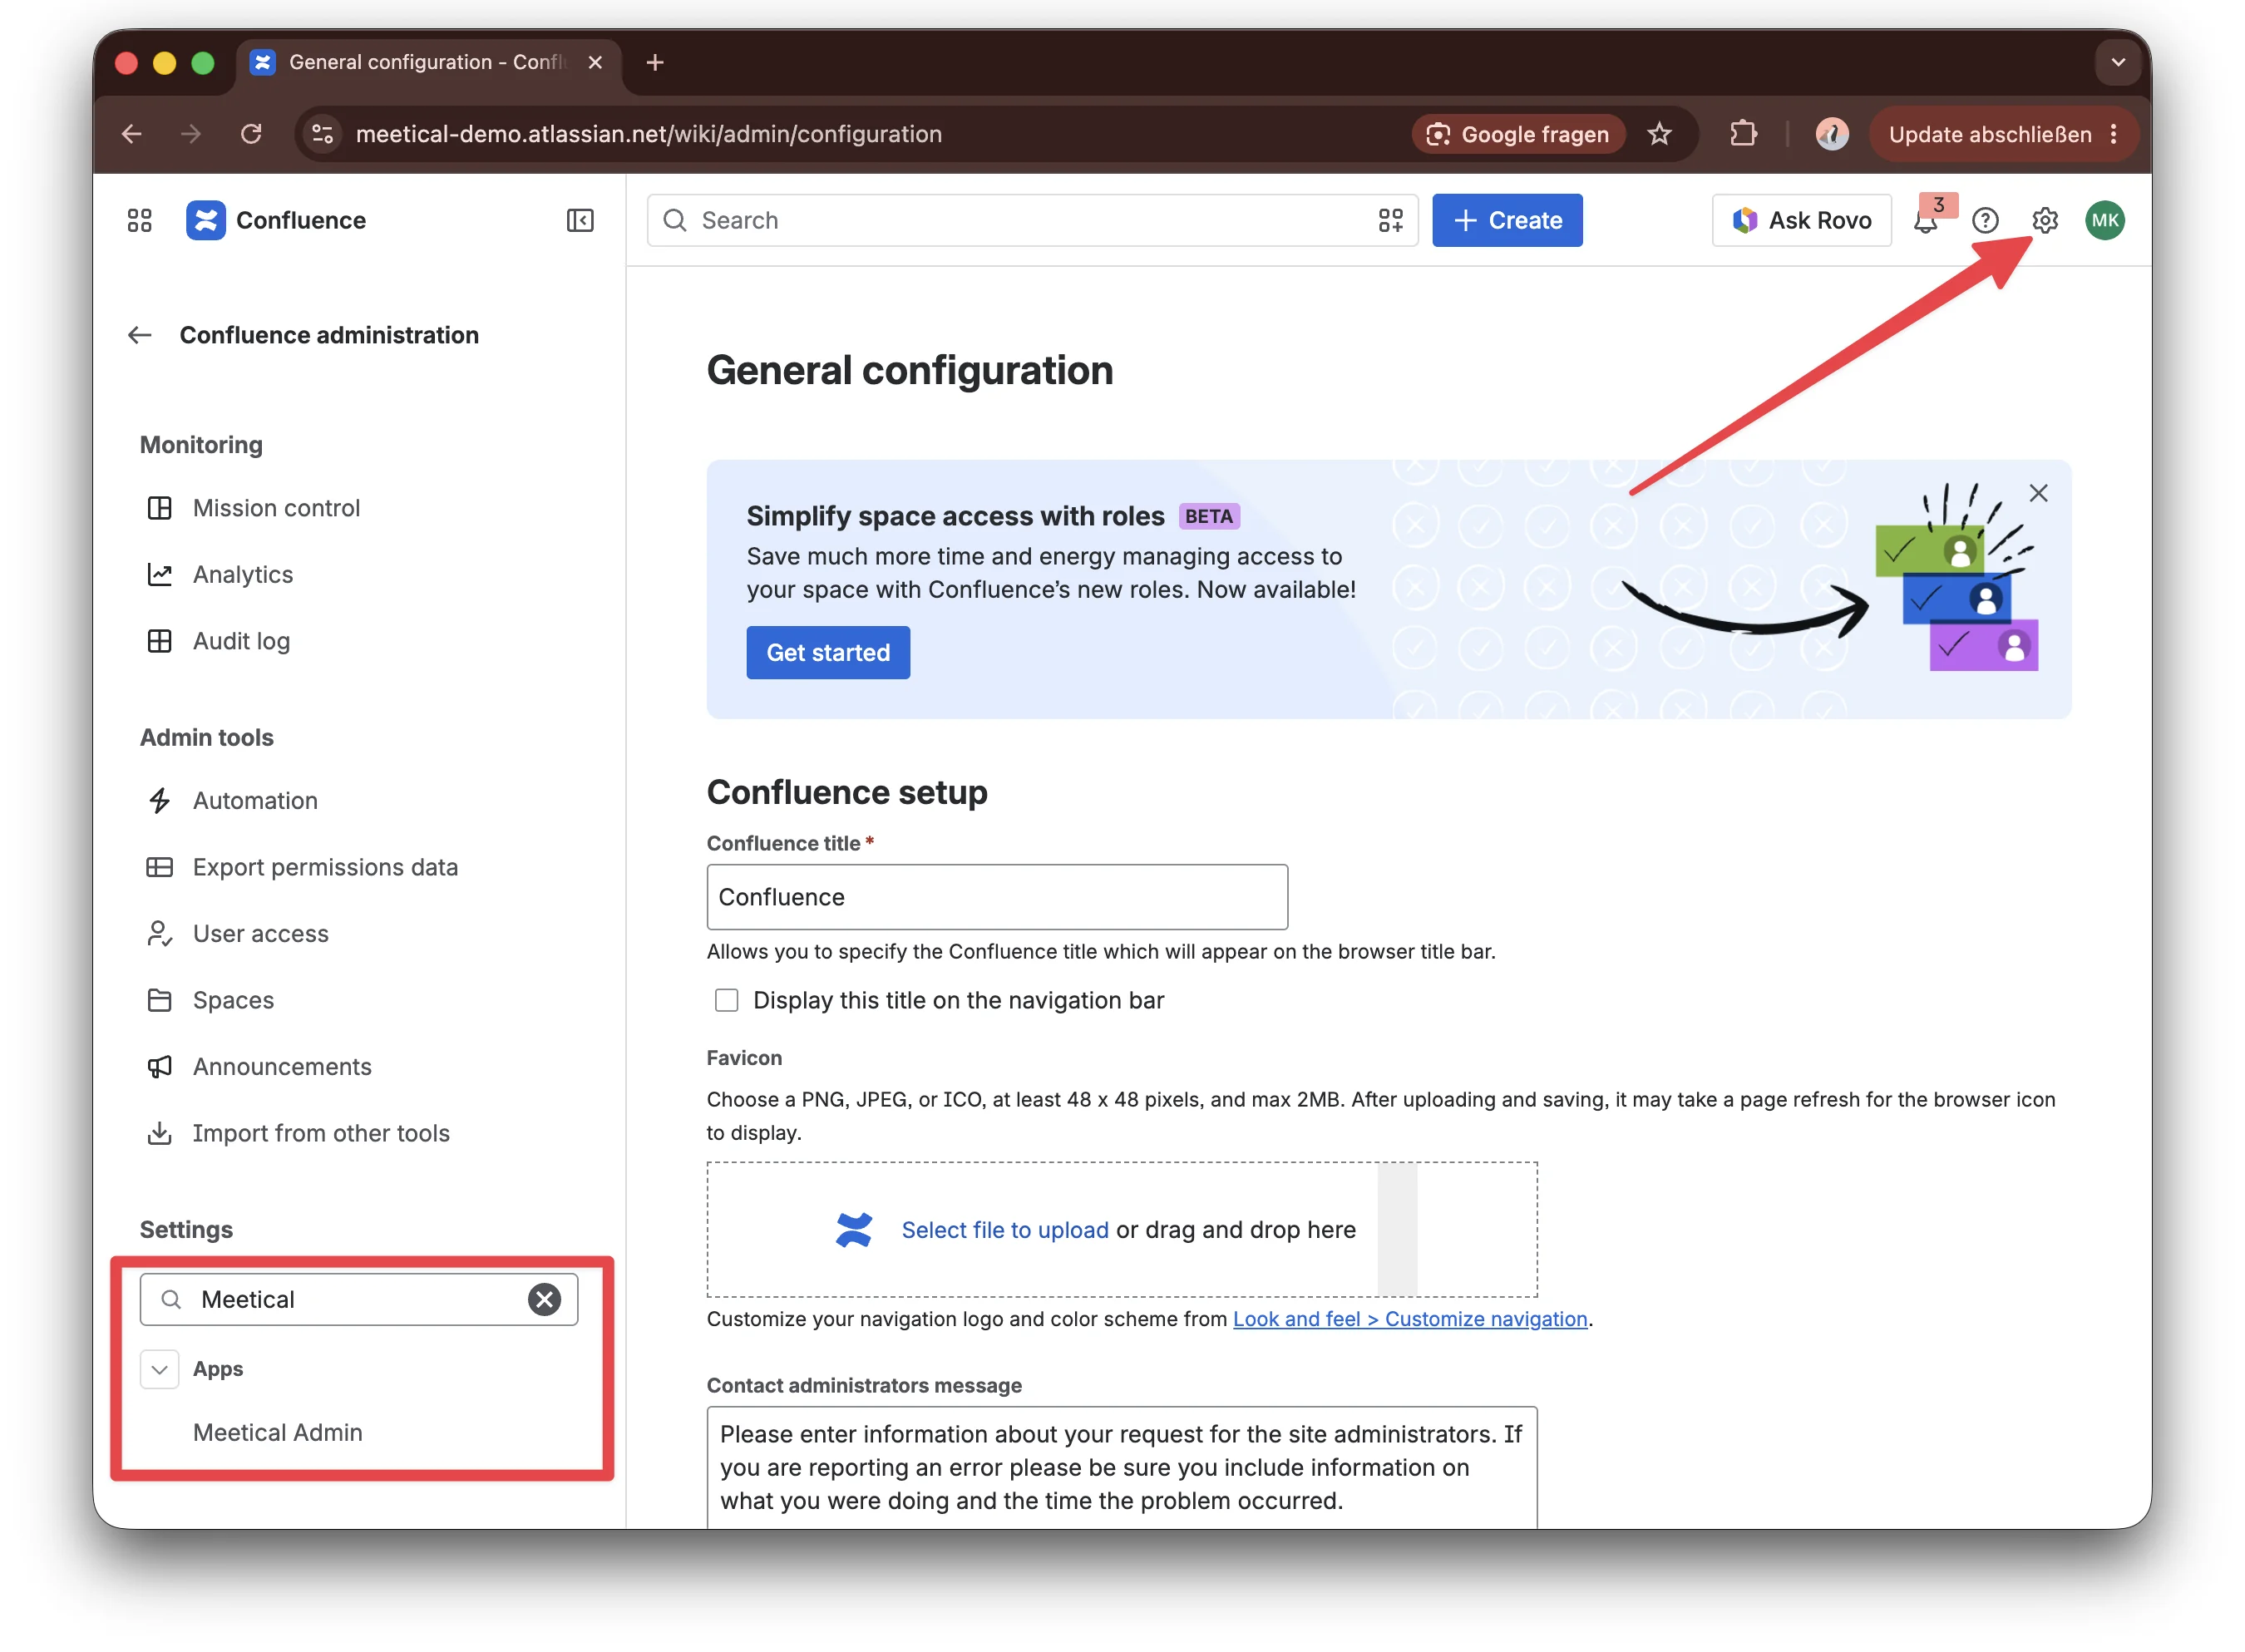
Open Confluence.
-
Click the gear icon in the top-right corner to open Confluence settings.
-
In the left sidebar, search for Meetical Admin.
-
Open the Meetical Admin settings.
Step 2 - Enable Meetical AI
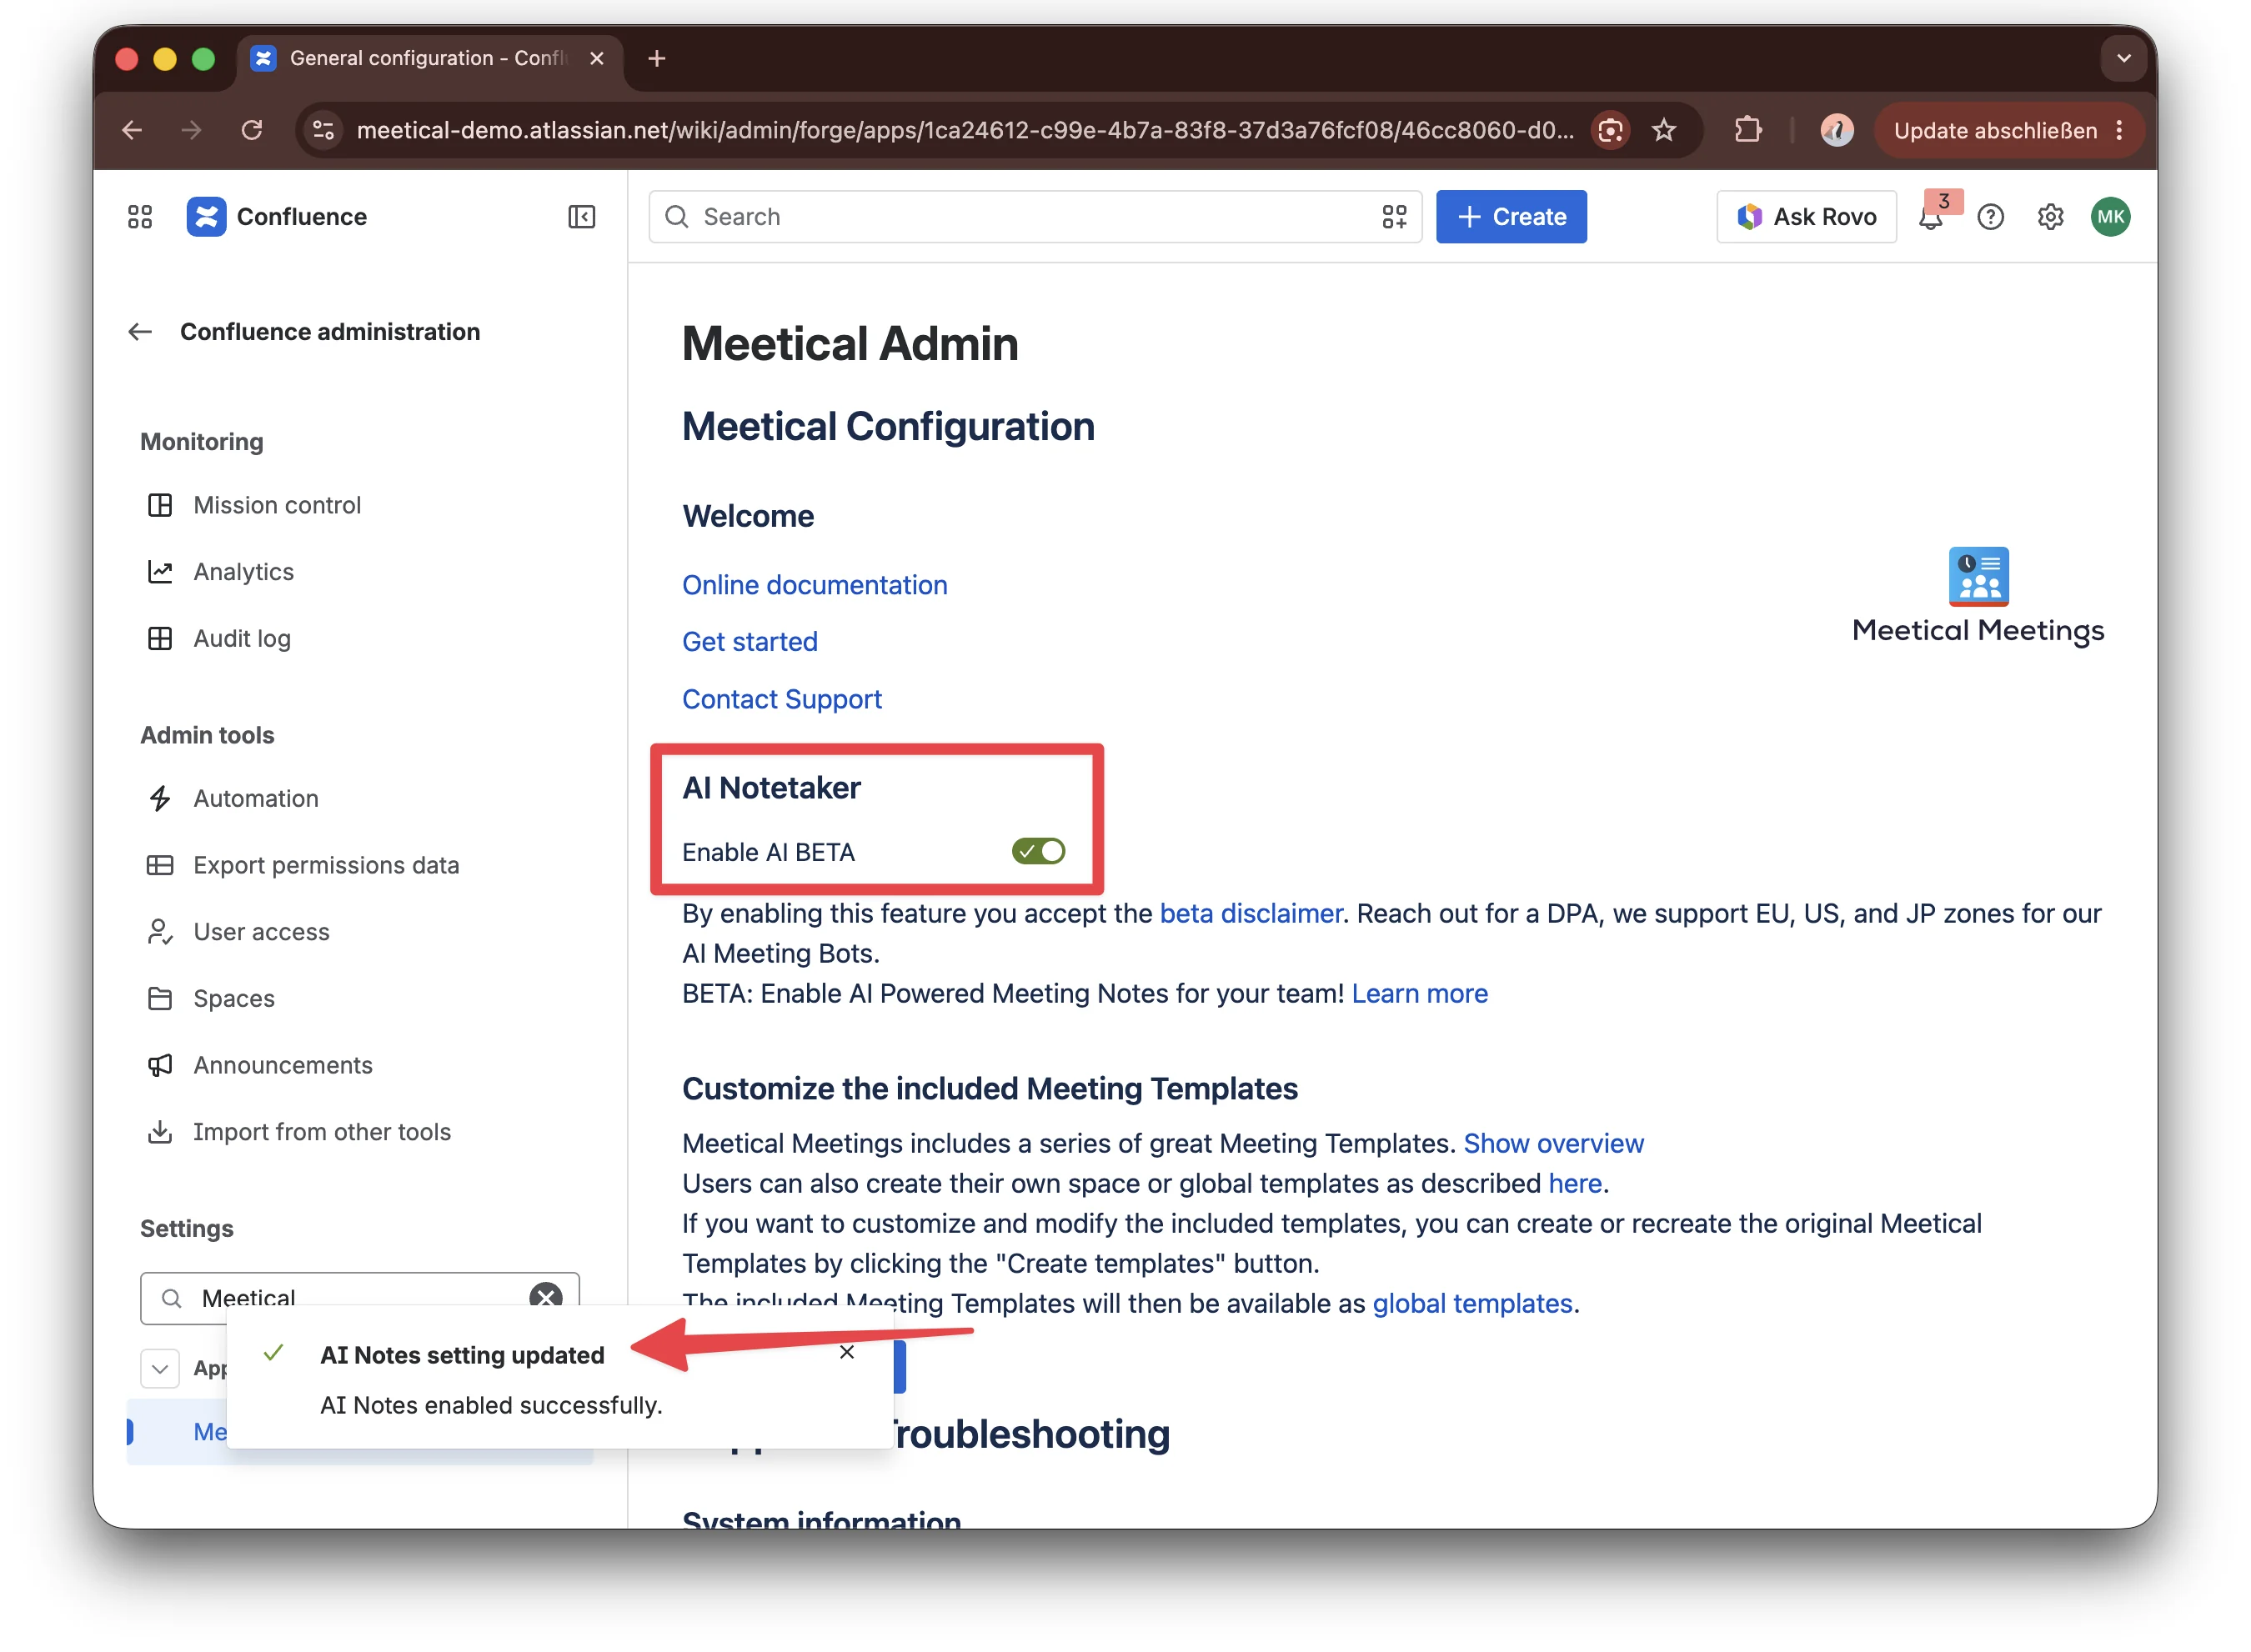
In the Meetical Admin settings, switch the Enable AI BETA toggle ON or OFF, depending on your preference.
After changing the setting, look for the success message confirming that your settings have been updated.
By enabling Meetical AI, you accept the beta disclaimer.
Step 3 - Use Meetical AI
Once Meetical AI is enabled, all Confluence users on your instance can use it.
To get started, follow this guide:
Generate your first Notes with Meetical AI
Limit access to specific users
By default, Meetical AI is available to all Confluence users on your instance once enabled.
Please reach out to us if you want to limit access to specific email addresses only.